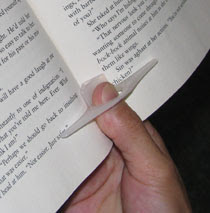
I prefer paperback books than hardbound books. There are several reasons why. First, it is lesser in weight ~ I can bring it anywhere whenever I travel. Second is the price~ It is less expensive than the hardbound books. Though, the paperback takes a little longer to come out in the stores. And Finally, I love covering books, so it is a very sane reason for me to buy paperback books. It's odd to cover hardbound books! Duh!
But I am particular in covering books. I use self adhesive plastic covers. I discover them when I traveled in Dubai. My boss asked me for help in covering her niece's books. Initially, I used them for my Archie Comic books. Then, when I returned home, I can't find it anywhere in the bookstores. Until last few years, I found a store that sells them. And I am so glad about it. I covered all my books with it and my friends thought my books are glossy. I told them they are covered with plastic and they didn't believe it until I showed them the proof that they are indeed covered. So, they asked me where to get it and how to use it, because the plastic is sticky, it will be all over your fingers, if you don't know how to do it. So, I told them my secret and it will no longer be a secret.
Since I mentioned yesterday that I might show you how to cover my book (the one that I bought yesterday) , I am here to show you, using that particular book, which is The Golden Compass. Just disregard my stubby fingers, okay?
~ you will be needing ~
~ Self-adhesive plastic cover ~
~ Scissors ~
~ Slightly-moisted tissue ~
First, you need to clean the surface of your book from dust and adhesives, with the use of moist tissue. Get the dimension of the book that you will be covering. Add a quarter of an inch from all sides. Cut the plastic cover. This cover has guides so you can just use them for cutting straight lines and I just use the guide for the additional length for folding purposes.
Then, fold the cover to get the middle and mark it. Lift the adhesive of one side.Put the book in between the folds, making sure that the books is centered and carefully tap the bounded side of the book so that the adhesive will stick.
With the use of moist tissue, ease out the cover carefully from the bounded edge of the book towards the other edge. What I do here so that there won't be bubbles is to slide the tissue from middle to top, middle to bottom moving progressively towards the edge of the book.
When you have completed the front side, the back side will be easier because there is still a paper holding the adhesive. So you can just simply slide it off while doing the same procedure.
We are almost done! You just need to cut the edge neatly on the bounded part and the point of the other edges of the book so that when we fold the cover, it will fold appropriately. Now, when you cut the edge within the bounded area, make sure that you don't leave any excess cover. That way, the edges are well-protected.
Fold the plastic cover that I told you to add, inward, tapping the edges first so that the plastic is accurately folded ( no excess, we need clean edges).
If it is just a normal book, it is already done. But since this book has a cover short of 2 millimeters, we need to protect the first page too. Get a strip of plastic cover and remove the paper from the adhesive. Place half of it on the next page, where it is exposed (I normally give it 1 inch to 1.5 inches), then folding the other half on the other side. Flatten it smoothly and cut the excess part on top and bottom of the book. There are other books like this, for example, The Mysterious Benedict Society.
Voila! My finish product! A glossy well-protected paperback!
Well, I hope you like it and learned from this tutorial. No fingers were harmed in doing this demo. You will find all my precious paperbacks are neatly covered with this. So, see yah later! Heck! the newly bought adhesive plastic cover is not as sticky as the old ones.
~ back to homepage ~


